
InternetMap-Toplogy
Topology draws your experiment as a network diagram. Use it to understand how nodes connect, examine Internet exchanges and transit networks, find endpoints, and observe traffic. Diagram positions represent a layout of connectivity rather than geographic locations.
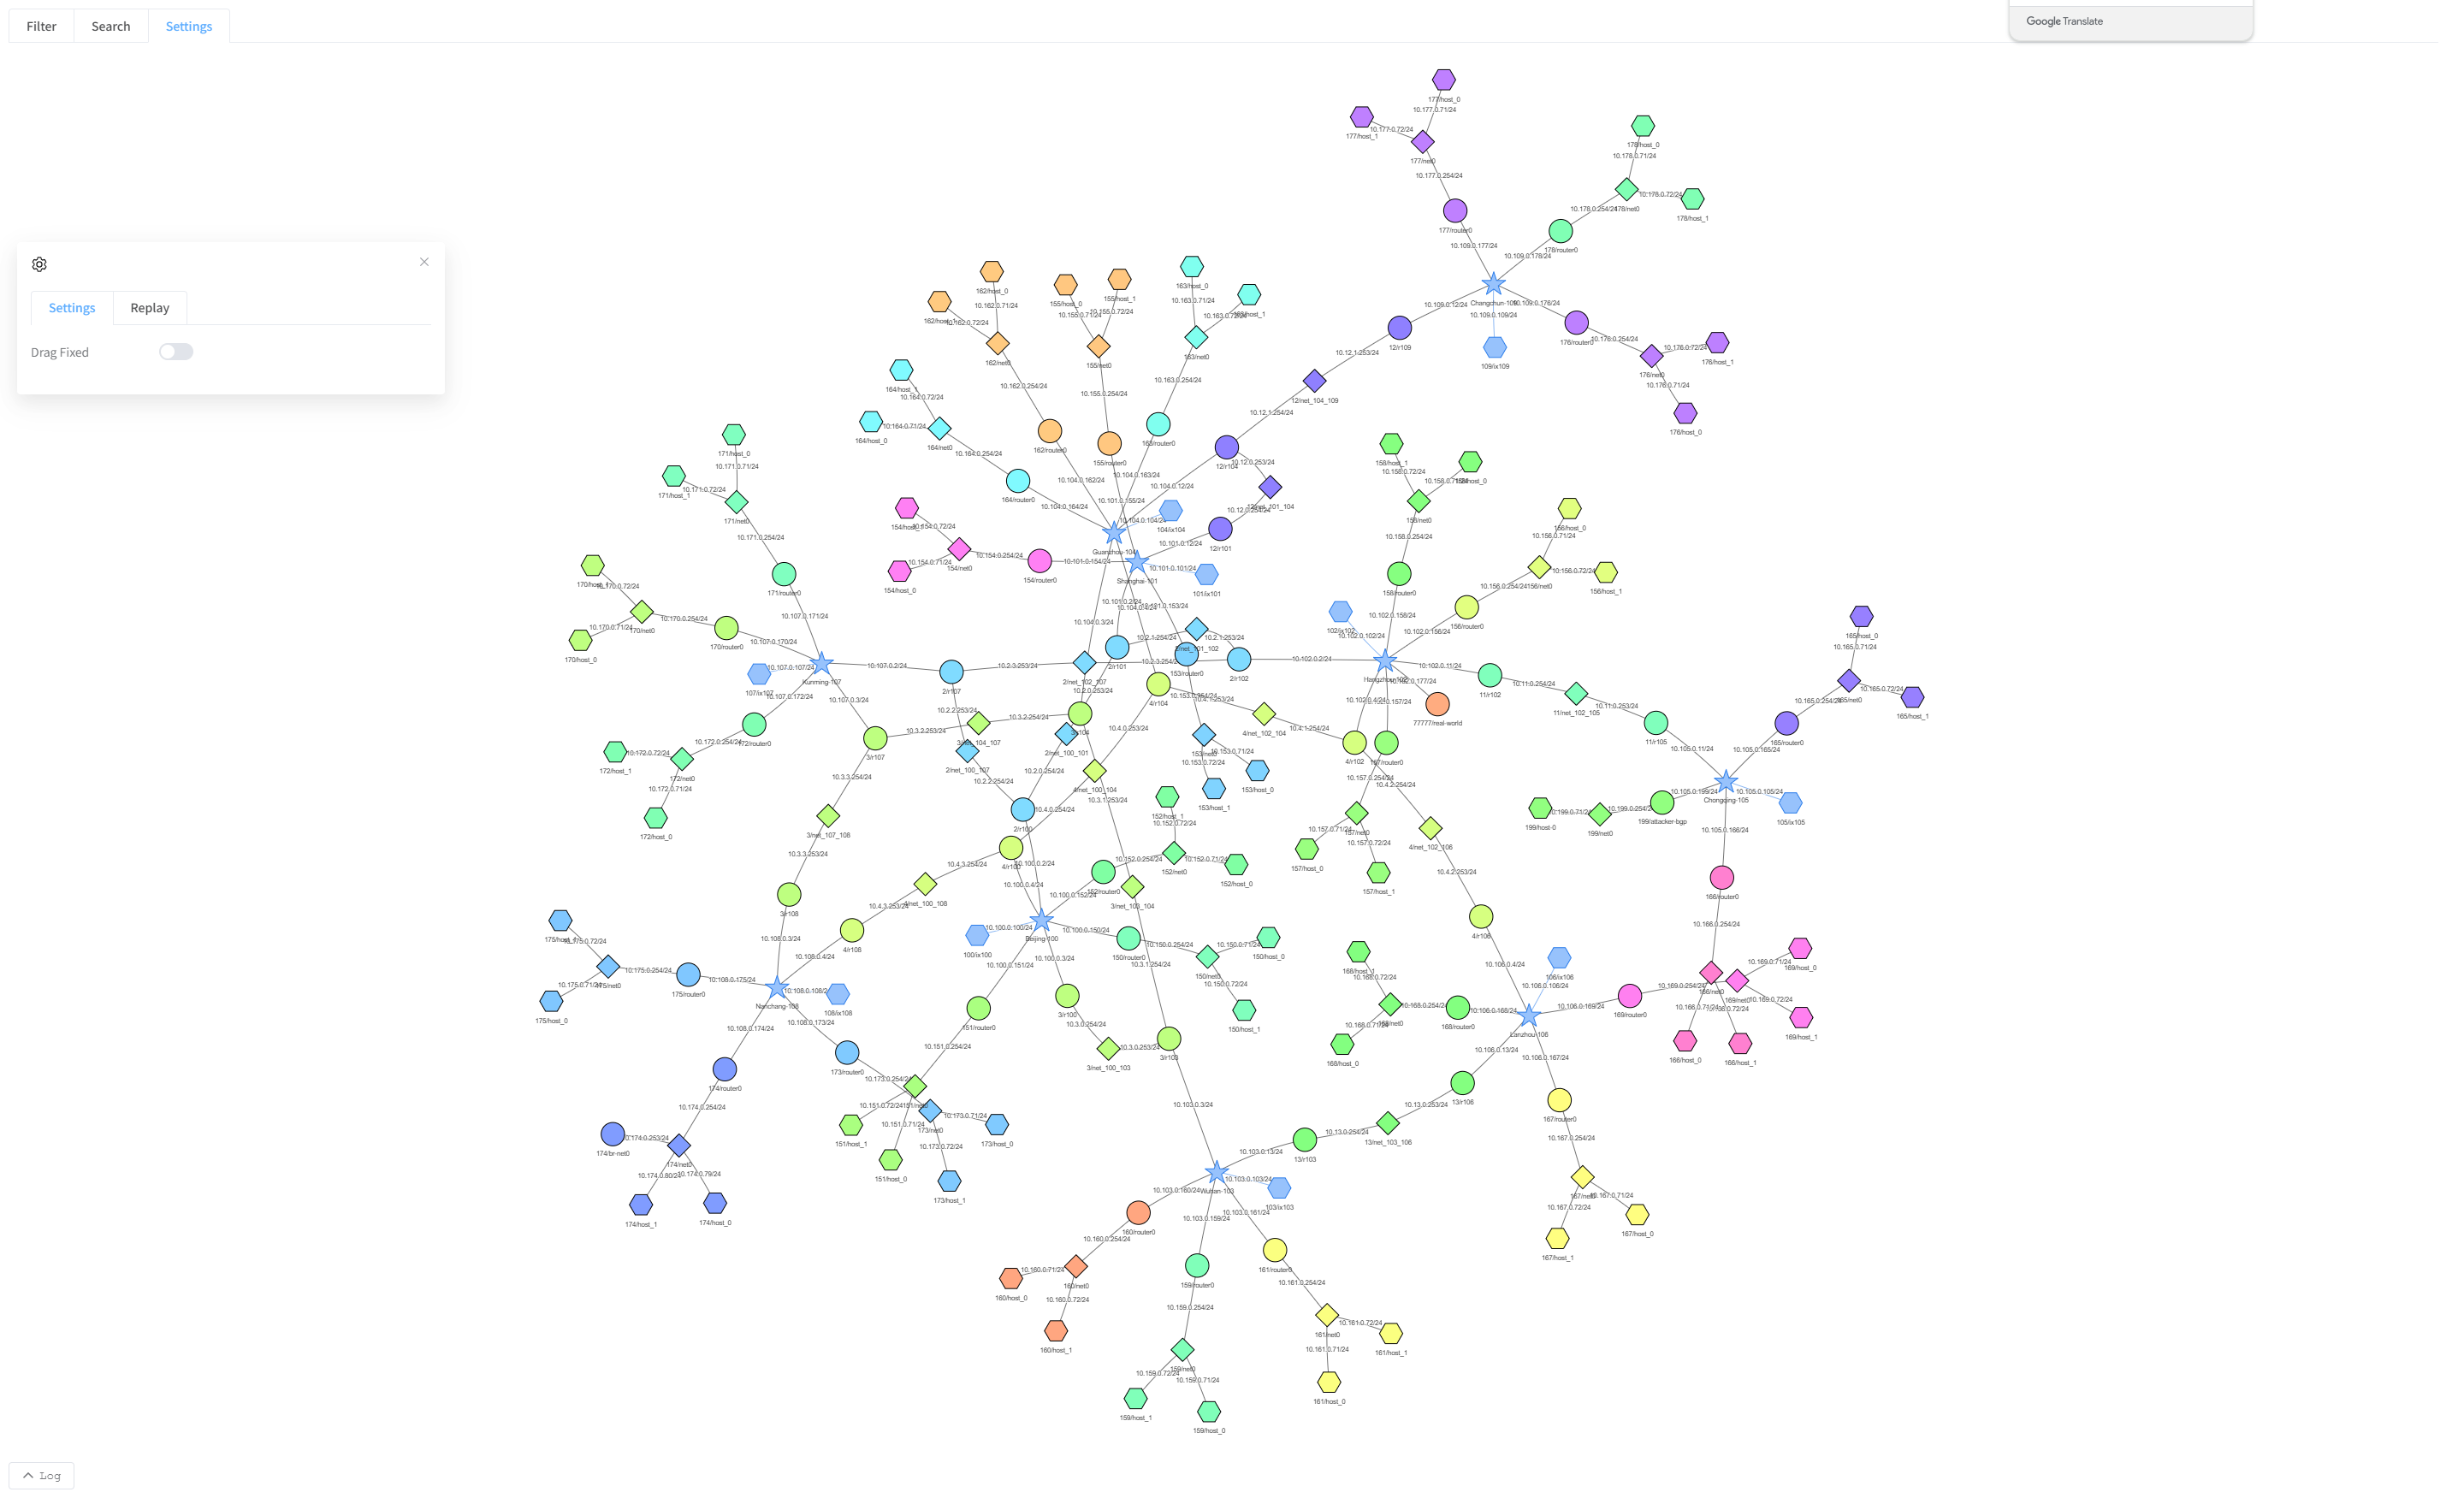
Use with the emulator
Add the following code to your emulator script before compiling the experiment. This example assumes that emu is your configured emulator, platform is your selected Docker platform, and Docker and InternetMap are already imported from your installed SEED Emulator version. Your version must support the InternetMap container bundle.
docker = Docker(platform=platform)

# Add Internet visualization services: topology, geographic map, and traffic observation.
# The second argument is a container name suffix that distinguishes bundle instances.
internet_map_bundle = InternetMap(emu, ".map.seed")
# Customize the bundle network; provide at least one IP per container, in creation order.
# All IPs must belong to the configured subnet, which should not overlap other networks.
internet_map_bundle.setDefaultNetwork(
    name="internetMap_network",
    prefix=".map",
    ip_addresses=[
        "172.30.0.10",
        "172.30.0.11",
        "172.30.0.12",
        "172.30.0.13",
    ],
    network_config={
        "driver": "bridge",
        "ipam": {"config": [{"subnet": "172.30.0.0/24", "gateway": "172.30.0.1"}]},
    },
)
# Provide a host port pool (range excludes the stop value); InternetMap needs at least 3 ports.
internet_map_bundle.setPorts(list(range(8081, 8089)))
# Register the bundle with the Docker compiler to generate its containers during emu.compile().
docker.addContainerBundle(internet_map_bundle)
Continue with your script’s rendering and compilation steps, passing this docker compiler to emu.compile(). Register the bundle once per experiment; the same bundle provides both Geographic views and the Topology website.
The example network must not overlap the experiment’s other networks. The port pool contains ports 8081 through 8088; it is not a fixed assignment of a particular port to a particular service.
Find the service ports
After running the emulator script, read the service port mappings printed in the terminal. For example:
service seedemu_internet_map_toplogy: port mapping ['8087:80']
service seedemu_internet_map_geographic: port mapping ['8086:80']
service seedemu_traffic_observer_service: port mapping [8088]
You can also open the generated docker-compose.yml and find the ports entry under the relevant service. The following excerpt shows the same example mappings:
services:
  seedemu_internet_map_toplogy:
    ports:
      - "8087:80"

  seedemu_internet_map_geographic:
    ports:
      - "8086:80"
For a mapping such as 8086:80, the number on the left is the host port used in your browser; the number on the right is the port inside the container. Use the actual mapping from your generated output, as assignments can differ between experiments.
Open the view
Open Topology Home at http://<ip>:<port> on your Topology website. From the home page, choose:
- MAP to view a live experiment.
- Upload MAP to upload and explore a saved topology.
First walkthrough
- Once the experiment is running, open MAP to explore the network map. For offline work, choose Upload MAP to upload a saved topology; runtime actions are unavailable for uploaded nodes.
- Wait for the diagram to load, then drag empty canvas space to pan and scroll to zoom. The network map guide also explains how to expand or collapse nodes.
- Open Search, enter a node name or IP address, and submit it. Use Search and display settings to find matches and adjust the layout.
- Click a matching node to inspect its details. For live nodes, see Node actions and terminals for console access and connection controls.
- To focus on exchanges or transit networks, return to Home and choose IX MAP or TRANSIT MAP. Follow the IX view or Transit view guide to select the groups to display.
- On a live map, open Filter to observe packets, Replay to review recorded activity, and Log to inspect packet records. See Capture, replay, and packet log.
- To inspect node and network tables, open DASHBOARD from Home and follow the Dashboard guide.
- If your experiment requires additional visualization tools, open PLUGIN from Home and follow the Plugins guide.
Common questions
| Problem | What to try |
|---|---|
| The map is empty | Wait for the experiment to finish starting. On IX / Transit pages, check the initial display prompt and your selected groups. |
| A host is missing | Use MAP or expand an appropriate node; IX and Transit views initially show less detail. |
| A search finds nothing | Use a name or address from the loaded experiment and check which groups are displayed. |
| No packets appear | Check the capture filter, real traffic, and the availability of capture in your lab. |
| Console or runtime actions are absent | Uploaded topologies have no runtime controls; live controls also depend on the lab configuration. |
| A Dashboard toolbar button does nothing | Several actions in that page are placeholders; see the Dashboard guide for supported tasks. |
For spatial views, use Geographic 2D or Geographic 3D.